Horse riding can be great for so many reasons (not least because it’ll keep you healthy), but if you’ve never ridden a horse before it can be daunting and difficult to know where to start. Like everything in life its better to break things down into smaller steps which is why I thought it would be a good idea to write a step by step guide covering every aspect, from what to wear to how to control a horse.
While there is nothing stopping you buying a horse and learning to ride on it most people won’t do that straight away which is why I decided to focus this guide on people who will be learning at a riding school or with an instructor on a riding school horse.
Choosing your horse riding style
There are two main riding styles that many disciplines full into, Western and English, and while the principles behind them are similar there are a lot of differences between the two, including tack and rider attire. Many riding schools and instructors will specialize in one or the other, and most countries will tend to lean towards one style. Western is more popular in countries like the USA, Canada, and Australia while English (as you probably guessed from its name) is more popular in European countries such as the UK, France, and Germany.
If you want to know more about the differences then you’ll find this recent article helpful.
How to find a horse riding school or instructor
Before you start to look for someone to teach you to ride it’s a good idea to have an idea of what you’d like to do long term, i.e. do you just want to ride for pleasure, or do you secretly want to be the next Charmayne James or Jessica Springsteen? This will help you to find a school or instructor, while many won’t specialize in a particular discipline, some will.
When it comes to actually finding a good riding school or instructor it’s always a good idea to start by asking around and seeing what people recommend. If you’re new to the world of horses though then you can ask in your local tack shop if there’s anybody they can suggest or, if not, then a quick google search (other search engines are available) will give you a list of places close to you.
Don’t be afraid to ask a potential instructor any questions if you’re not sure about something, it’s important that you can talk to them.
Private or group lessons?
Many riding schools will offer both private and group lessons and which one you opt for will, to some extent, depending on your budget. Private lessons are one-to-one lessons where you and your instructor work together to achieve your goals but, because you’re the only person in the lesson, they’re more expensive. Group lessons, on the other hand, are often a lot cheaper because you’re sharing your lesson with other people, normally at the same level as you. While group lessons are cheaper you’ll be learning at the same time as everybody else which can, for some people, slow the process of learning down.
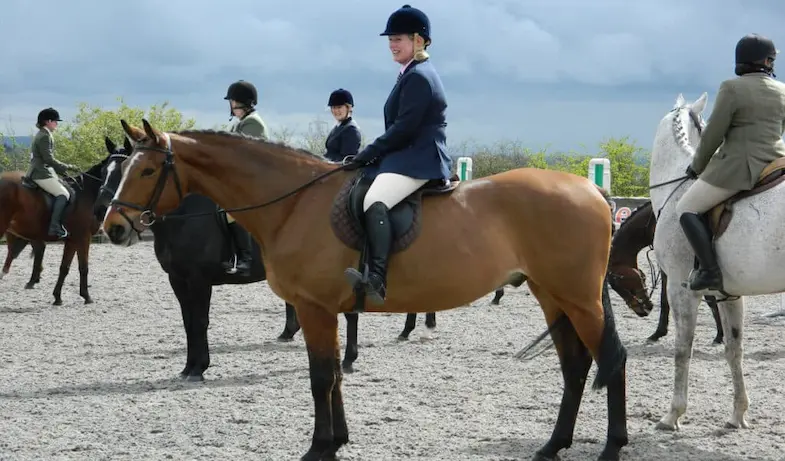
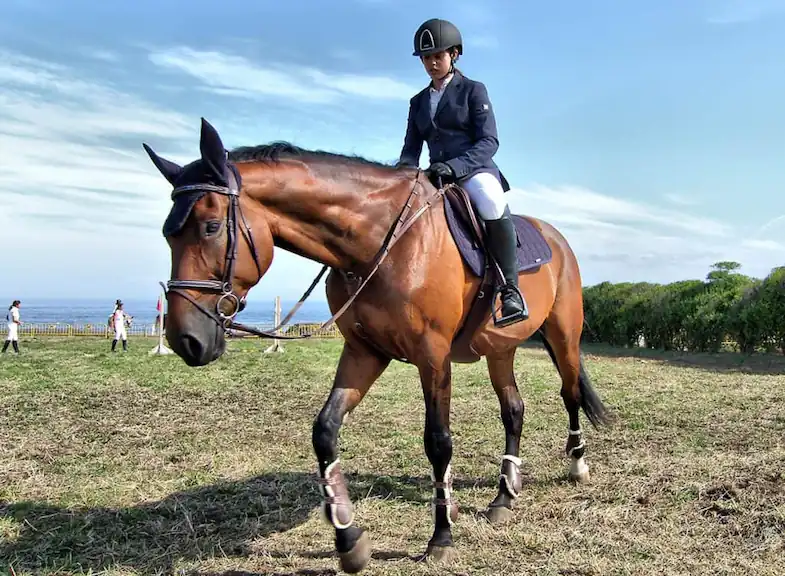
What should you wear for your first horse riding lesson?
Horse riding can be expensive and while most people will enjoy it its not for everybody so you don’t want to fork out a lot of money until you’ve had a few lessons and are sure you want to carry on riding. Of course, there’s nothing stopping you kitting yourself out with a brand new riding outfit but with a few exceptions most day to day clothes will be fine for horse riding.
Footwear
What you wear on your feet is one of those exceptions where it’s extremely important what you wear. Your footwear should be comfortable but should also be practical, no matter how comfortable you find kitten heels or sneakers they’ll never be suitable footwear for horse riding, the ideal footwear will be something with a small platform type heel. This is crucial because you don’t want your feet to slip through the stirrups and, especially when you’re learning, it’ll take a little while for you to find the correct position for your feet and legs.
Riding helmet
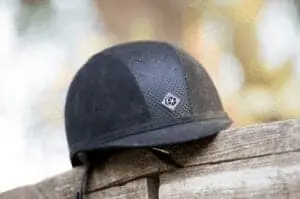
In some countries wearing a riding helmet is a choice rather than the law but in my opinion, its a must, even if you only wear it when you’re learning, especially when you consider that head injuries are the most common type of serious injury. A riding helmet is also one of those things that you can’t (or at least shouldn’t) cut corners on, yes you can borrow one from the riding school or your instructor but can you be sure it’s not been dropped? You can borrow one and it is better to do that than not wear one at all but I really do think you should invest in your own and your local tack shop will help you get the right one.
If you want to know more about why riding helmets are so important then this article covers that, along with what the law says.
Clothing
When it comes to your clothing it doesn’t matter so much what you wear although you don’t want to wear something that is so tight and clingy that you’re not comfortable, but at the same time you don’t want to wear really baggy clothing that will flap in the wind and possibly scare the horse.
The style of riding you opt for will play a roll in the type of pants you wear, if for example, you’re learning to ride Western then jeans are fine but if you’re riding English then jeggings, breeches or jodhpurs will be more comfortable and will stop your legs being pinched.
Want to know more about what to wear for your first lesson? A beginner’s guide to horse riding attire.
Preparing for your first horse riding lesson
You might think that you can’t learn to ride a horse without being on a horse and of course, that is largely true but there are some things that you can do before you first get on a horse.
Using a mechanical horse
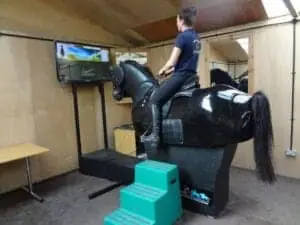
Sometimes known as a horse simulator you might be surprised to know that mechanical horses have actually been around for a long time. They were originally used as exercise aids around 200 years ago but today’s mechanical horses are far more complicated now and can mimic all levels of riding and can even help you to learn how to fall safely.
Due to their cost, not all riding schools will have a mechanical horse but if you’re able to use one then it can help you a lot. It’ll help you to learn how to sit properly and keep your balance while the horse is moving.
Strengthening your core muscles
You use a lot of different muscle groups when you’re riding and while these will obviously become stronger over time you can help improve them before your lesson. The main muscles to concentrate on are your core muscles, these will help you to maintain your posture and balance while riding.
One of the best exercises for strengthening this is known as a single arm and leg reach. This is where you kneel on the floor with your hands on the floor too. You then stretch your right arm and left leg out and hold that for 5 seconds, before repeating with the other arm and leg. If you do this ten times a day for at least a week before your lesson you’ll find it much easier to hold you balance while the horse is moving.
If you already have a strong core then you might want to try these core exercises that are especially good for horse riders.
How to get onto a horse
Many ‘how to’ guides for horse riding leave out the first step and start when you’re actually sitting on the horse. While these guides can be helpful it’s important to know how to actually get on (called ‘mounting’) a horse, otherwise, you’re not going to be doing any riding at all. There are two ways to mount a horse, either from the ground or from a mounting block.
Mounting a horse from the ground
When you’re first learning to ride your instructor (or a helper) will hold the horse steady for you but the way you mount will still be the same. You’ll always be told to mount from the left so make sure you’re standing on your horse’s left-hand side, you can practice mounting from the right later but while you’re learning you should mount from the left.
- Hold the reins firmly in your left hand but don’t pull too tightly on them. You should apply enough pressure to your horse’s mouth so that he knows to stand still but not so much that he moves away from the pressure.
- Put your left foot in the stirrup and put your weight on the ball of your foot once its in place. If you’re finding this difficult at first you can either hold the stirrup in place with your right hand or lengthen the stirrups.
- Pull yourself up by putting your weight on your left foot and swinging your right leg over the horse. If you’re finding this difficult you can ask somebody to help by lifting your right leg as you pull yourself up.
- Gently lower yourself down onto the horse and put your right foot in the stirrup.
- Adjust the stirrups if they’re not the right length for you.
Mounting a horse from a mounting block
Many riding schools have mounting blocks that make it easier for you to get onto the horse and can also be kinder to the horse over a long period of time. If you choose to use a mounting block you may find that when you arrive for your first lesson the horse is already standing by the block.
- Make sure the mounting block is in the right place, if your instructor isn’t holding the horse for you then you need to make sure the mounting block is just under the left stirrup.
- Hold your horse steady by placing the reins in your left hand and holding them so they apply a little bit of pressure on the horse’s mouth.
- Climb on the block and place your left foot in the stirrup so that the ball of your foot is resting on the stirrup before gently moving your weight to that foot.
- Swing your right leg over the back of the horse, making sure not to kick him as you do.
- Gently sit in the saddle and pick up the reins in both hands.
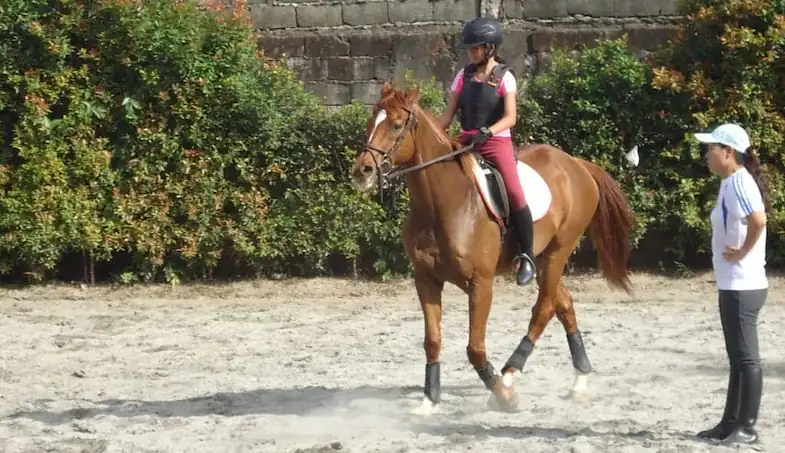
Getting your horse riding position right
How you sit on the horse can have a big impact on both you and your horse, if you’re not sitting properly your horse will have to work harder to keep his balance and you’ll tire much more quickly. It’ll take time to get the right position and to be able to maintain it throughout a lesson but ideally, there should be an imaginary line running from your shoulders down to your hips and finally to your heels.
- Head – Your head should be held up and you should be looking forward, through the horse’s ears.
- Arms – Your arms should be relaxed but close to your body.
- Hands – Your hands should be roughly level with the front of the saddle.
- Shoulders – Your shoulders should be up and back.
- Back – Your back should be straight, forming a straight line from your shoulders to your hips.
- Legs – The position of your legs will differ depending on the style of riding but your knees and thighs should be able to grip the saddle.
- Feet – When it comes to your feet your toes should be pointing upwards and your heel downwards.
Some people find it helpful to take their feet out of the stirrups, straighten their legs as much as they can then put their feet back in the stirrups.
How to hold the reins
The reins are very important because they allow you to ‘steer’ the horse as well as stop him so its vital to make sure you’re holding them correctly. Western and English reins are both held differently but in both cases, you shouldn’t pull on them, instead, give your horse a little bit of slack.
How to hold Western reins
How you hold Western reins will depend on that type of bit the horse has (you can read about different bits here), if it’s a snaffle bit then they’ll be held in the same way as English reins, but for a curb bit, you hold the reins with both hands but control the horse with one hand.
To hold the reins properly, your hand (normally your left hand but whatever is most comfortable for you) should form a vertical fist with the reins coming up through the bottom of your fist and out the top between your thumb and index finger. The excess rein should be on the opposite side and held in your other hand which should be resting against your leg.
How to hold English reins
When you’re holding the reins properly there’ll be an invisible line running from the horse’s bit through the reins to your hands, wrists, and then elbows.
To hold the reins properly they should pass between your little and ring fingers and then over your index finger and held in place by gently ‘squeezing’ them between your index finger and thumb. Your wrists should be relaxed and approximately four inches apart.
Keeping your balance on a horse
Keeping your balance as your horse moves can take a bit of getting used to, especially if you’re nervous. As your horse moves he’ll shift his weight which will cause you to move a little too which can feel a bit disconcerting at first but don’t worry you won’t fall off.
Instead of struggling to sit still and fight your horse’s movement try and relax and move along with him. This rocking motion will not only help you to keep your position but will also help your horse too because he won’t need to keep adjusting his balance to counteract your movement. If you’re nervous it can be difficult to relax but the tenser you are the harder it is for you to ‘rock’ with your horse.
How to get a horse to move
Now that you’ve got your balance and are comfortable with the horse moving its time to learn how to move the horse yourself. While you should use your voice simply yelling ‘Yah!’ at him won’t get him moving, instead, it’ll just stress the horse because he won’t understand what you’re saying or why you’re shouting at him. Instead, gently squeeze the horse with your lower legs and calmly ask him to ‘walk on’ (although some horses have been trained to move forward when the rider clicks their tongue). If your horse doesn’t respond to this you can tap gently with your heels but don’t kick him.
As your horse starts to move his head will nod up and down with the rhythm of his body so you should follow this movement with your hands. Don’t hold your hands firmly in one place but instead allow them to move with your horse so that the reins maintain the same amount of slack. Not doing this could hurt your horse’s mouth as the bit pulls against him. If you’re riding Western then the reins will already have plenty of slack so your hands don’t need to (and shouldn’t) move as much.
Want to know more about getting a horse to move? How to ride a horse at a walk.
How to stop a horse
To some extent being able to stop a horse is more important than being able to get them moving, after all, if you can see danger ahead you’ll need to stop before you reach it.
When you want to stop your horse begin by tightening your stomach muscles and making your body more rigid. I know I said to relax before but doing the opposite will signal resistance to your horse and he’ll know that he will need to stop soon. Next, tighten your knees and thighs against the saddle and increase your grip on the reins. It might sound counterintuitive to do this with your legs while tightening the reins but the reason you apply pressure with your legs is to let the horse know you’re about to give him a command, this is why you only apply gentle pressure rather than actually squeeze the horse.
Now that you’ve increased your grip on the reins slowly move them back towards you (while still keeping your hands at the same level), moving them an inch or two towards you will tell your horse that he needs to stop. Some horses will also respond to commands too so ask your instructor if there are any that you should use.
Once your horse has come to a stop release the tension in your body and relax your grip on the reins too before patting your horse.
How to turn a horse
The last thing you need to do is learn how to steer your horse. You might be surprised to know that you actually use your whole body to steer the horse, not just your hands. You should be looking in the direction you want to turn and signal with your legs which direction you want to turn. If you want to turn left you can do this but moving your right leg slightly forward and your left leg back a little, squeezing with them both at the same time. To turn right just do the opposite with your legs.
In order to turn your horse you also need to use your hands but how you do this will depend on the riding style.
Western
Steering a horse in Western riding is also known as neck reining because instead of pulling them in a particular direction you allow them to touch your horse’s neck which will signal to him to turn. To turn left move your hand over to the left and allow the reins to brush over the horse’s neck. To turn right just repeat this but move your hand to the right instead.
English
As with Western riding, you need to use the reins to signal to the horse which direction to turn but this time, instead of moving your hand over the horse’s neck, you need to move your hand towards you. You should only move the hand that corresponds to the direction you want to turn in so, for example, if you want to turn right bring your right hand towards you and vice versa for turning left.
If the horse doesn’t turn you can pull more on the rein but never pull too sharply, or too much because this will hurt your horse’s mouth.
How to get off of a horse
At the end of your lesson you’ll need to get off of the horse, which is always a shame if you’ve enjoyed yourself. Known as dismounting, this should be done when the horse is standing still.
- Take your feet out of the stirrups and relax them.
- Hold the reins in your left hand but make sure they’re tight enough so that you can stop the horse from moving.
- Place your hands on your horse’s neck just in front of the withers and lean your weight forward.
- Swing your right leg over the horse’s back, making sure you don’t kick him.
- Bend your knees slightly as you slowly lower yourself to the ground.
- Once you’re on the ground you can either hold the reins in your right hand, close to the bit. Or if you’re going to lead the horse, you can bring the reins over their head and hold them in both hands, with your right hand holding them near the bit and your left hand further down.
The next steps
Congratulations you’ve now got the basics of horse riding and can move it up a gear, you’re now able to progress onto things like trotting (or jogging), cantering, or even jumping. Everybody learns at a different pace so don’t be too hard on yourself if, after a few months, you’re not riding solo but your friends are. It shouldn’t be a race so relax and enjoy the ride, both metaphorically and literally!
Further reading
- Learn horse riding jargon
- Best breeds for new riders
- Is horse riding good exercise?
- Riding with back pain
- Can I ride while I’m pregnant?
- How to be a better rider
- What size horse should I ride?
- Riding safely in the snow
- What to expect in your first lesson
- Do horses like being ridden?
I hope you found this article helpful. If you did I’d be grateful if you could share it please as it would really help me.
Recommended products
Over the years I have tried hundreds of different horsey products, from various blankets and halters to different treats. Some I’ve loved, others I’ve hated but I thought I’d share with you my top all-time favorite products, the ones I never leave the yard without. I’ve included links to the products (which are in no particular order) that I really think are great.
- Horse Knots by Reference Ready – If you’re like me and enjoy pocket reference guides then you’ll love this knot tying guide. These handy cards can easily fit in your pocket or attach to the saddle for quick reference. They’re waterproof, durable and are color coded to make them easy to follow.
- Mane ’n Tail Detangler – Even if you never show your horse you’ll need to detangle his tail from time to time (and possibly his mane too) which is always a challenging chore! I’ve found that if I run a little bit of detangler through my horse’s tails every few days it stops them from getting matted up and makes combing them easy, even if they’re coated in mud. I don’t know if I should admit to this or not but it also works wonders on my hair.
- TAKEKIT Pro clippers – Over the years I’ve tried a lot of different clippers and while some were obviously better than others I found these to be by far the best. They are heavier than a lot of other clippers but for me, that’s a good thing, it makes them feel more sturdy and hardwearing. On top of that they have a range of speeds so are just as good for clipping your horse’s back as they are his face. I also like the fact that they come in a handy carry case but that’s not for everybody. The company that makes them is super good and incredibly helpful too, a real bonus these days. The only thing I wasn’t keen on was the fact that it doesn’t come with any oil, but that’s not a major problem as it’s not difficult to buy lubricant.
- Shire’s ball feeder – There are so many boredom buster toys out there but I like to use these every day, regardless of whether or not my horses are bored. I find that it helps to encourage my horses to problem solve by rewarding them with treats (or pieces of fruit) but it also mimics their natural grazing behavior which helps to keep them calm and de-stressed.
- Horse safe mirror – This is a strange one that many people are surprised about but I like to put horse safe mirrors in the trailers as well as in the quarantine stalls. It helps to prevent the feeling of isolation by giving the impression of other horses being around. Being herd animals horses can get extremely stressed when they feel that they’re on their own but with these stick-on mirrors, they believe that at least one other horse is with them.
- Rectal thermometer – I know this isn’t glamourous at all but it’s vital for your horse’s well-being to be able to check their temperature and a rectal thermometer is the easiest way of doing this which is why I’ve added it to the list.
Shopping lists
I’ve also put together a few shopping lists of essential items that I’ve found helpful over the years. I’ve broken the lists down into different categories rather than put everything in one massive list 😉
Recent Posts
Pads & Blankets: What Are They And Are They Really Necessary?
When we think about what tack we need, saddle pads and saddle blankets aren’t often at the forefront of our minds. We all know that they go underneath a saddle but there’s still a lot of...
Have you ever wondered what racehorses wear over their eyes, or seen a horse pulling a carriage with its eyes covered? Known as blinders or blinkers, these strange coverings do actually serve a...
