As a riding instructor, I’ve taught thousands of people to ride over the years and one thing I’ve learned myself over that time is that people always learn better if you break things down into separate stages. As they say, you’ve got to learn to walk before you can run and horse riding is no different, which is why I decided to create this series on how to ride a horse at every gait.
Once you’ve mastered how to ride a horse at a walk it’s time to pick up the pace and start to learn how to ride a horse at a trot. In this article, I’ll walk you through (pardon the pun) exactly what you need to do to get your horse to trot as well as how you should move. At the end, we will also look at things you can do to improve your position in the saddle.
What is a trot?
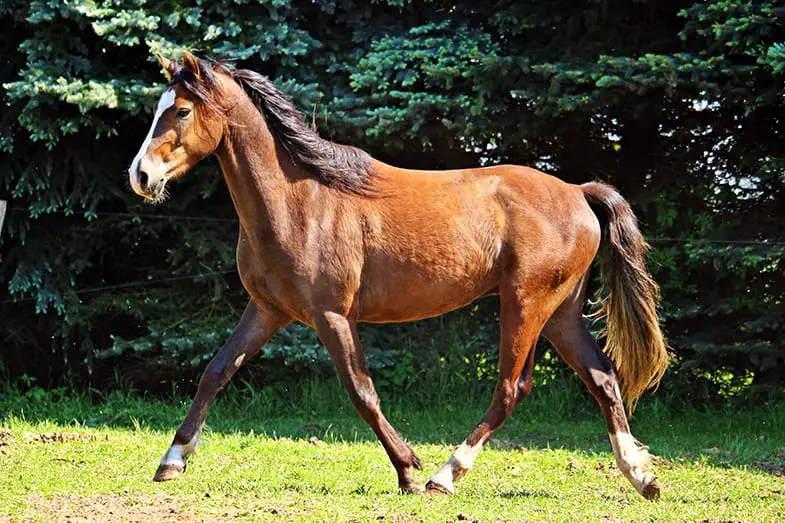
Believe it or not, the trot is actually the fastest way for a horse to travel, at least if they’re covering long distances. While it might not be the fastest in terms of its top speed, horses can cover far more ground at a trot than they can in any other gait. This is why it’s so important to master the trot.
So what actually is a trot? To put it simply the trot is a two-beat gait where the horse’s legs move in diagonals (ie the left foreleg and right hind leg move together as do the right foreleg and left hind leg).
Want to know more about how horses move? How to recognize and understand horse gaits.
How do you ask a horse to trot?
To some extent asking a horse to trot is easier than asking them to walk because they’re already moving and you can use their momentum to ‘encourage’ them to go faster but you still need to use your legs, seat, voice, and reins.
Reins
While you don’t need to use your reins to ask the horse to trot it is important that you shorten them a little before you start trotting. The reason for this is that as a horse picks up speed it’ll bend its neck slightly which means that, in order to be able to give the horse effective cues, you’ll need to shorten the reins slightly. They shouldn’t be tight but nor should they droop, instead they should have a little bit of slack.
Legs
Once you’ve shortened the reins you should give the horse a quick, but gentle squeeze with your legs. To start with most horses will increase the speed of their walk which is good. When you’re happy with this, and with your balance, you should give the horse brisk squeezes until they begin to trot.
Seat
As with a walk, you should make sure your seat is relaxed and that you’re well-balanced. You should also be sitting over your ankles with a direct line going from them through your hip to your head.
Voice
Some horses have been trained to understand, and respond to, verbal cues such as a click of the tongue or the word ‘trot’. If your horse has been trained to respond to these cues then you can also use them when asking the horse to trot.
As soon as your horse starts to trot you should relax your body and stop squeezing with your legs.
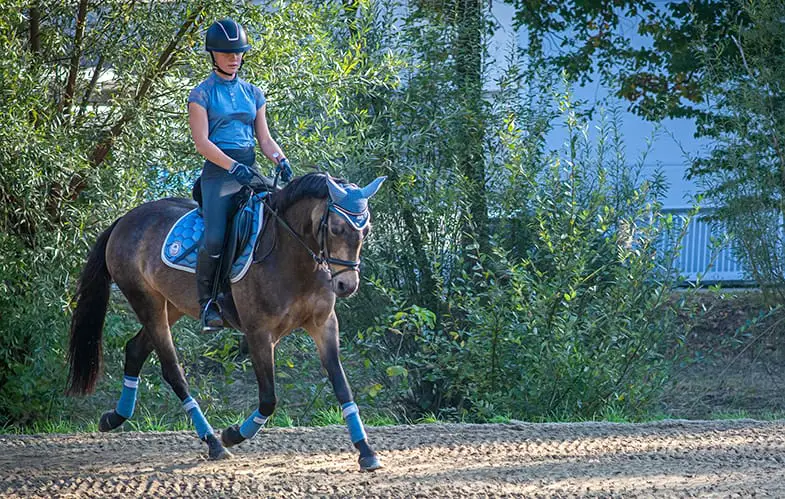
What’s the correct position for riding a horse at a trot?
While some horses will be smoother than others trotting can still be very bouncy if you’re not used to it and you may find your feet slipping in the stirrups. Don’t worry this is perfectly normal for beginners but if you maintain the correct position this won’t happen.
The correct position should be:
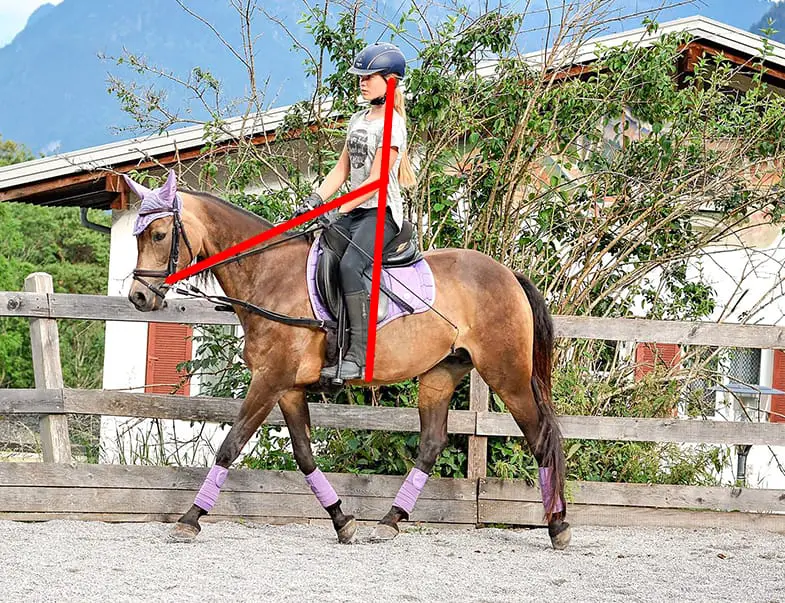
Head
Keeping your head up while trotting will not only help you to see where you’re going but it’ll also help you to keep your balance and maintain your posture. As well as having your head up you should also be looking forward through the horse’s ears. It can be easy to look down but doing so regularly will encourage you to slump in the saddle and ultimately lean forward.
Shoulders
It might seem like a strange thing to say but how you hold your shoulders will affect how your horse moves. If your shoulders are tense and tight then your arms and hands will be too which will cause the horse to resist your contact, making it harder for you to control them but also resulting in a poor rhythm. With this in mind, your shoulders should be relaxed but square, they should also be in line with your hips.
Elbows
Your elbows should be bent, relaxed, and resting by your sides which will allow you to maintain the weight of your shoulders. There should be a straight line from your elbows, through your hands, to the horse’s mouth; just as is the case with walking. When posting (more on this later) you should open your elbows, closing them again as you sit. Doing this will help you to keep your hands still.
Hands
If you’re riding Western then you should hold the reins with your left hand, resting your other hand on your right thigh with both elbows against your sides. Your left hand should be raised above and in front of the horn.
For English riding, you need to use both hands to hold the reins, again with your hands just above the saddle. Your elbows should also be slightly bent but relaxed and touching your sides.
Not sure about the different styles of riding? Differences between Western and English riding.
Reins
Regardless of whether you’re riding Western or English style, you should be holding the reins in front of you with your hand(s) just above the level of your hips. If you hold them too high you’ll be top-heavy and unbalanced, it’ll also be uncomfortable on the horse’s mouth.
Back
You should be sitting tall with a straight (but not rigid) back, this will help you to keep your head balanced and will also help you to maintain the correct posture. Having a relaxed posture will help you to absorb the horse’s movement.
Seat
When trotting you need to be able to move your hips freely with the horse which is why you should have a relaxed seat.
Legs
While you obviously need to grip the horse a little with your knees you don’t need to use your whole legs to grip. Your legs should hang naturally with your thighs, knees, and calves almost cuddling the horse.
Feet
It’s common for your feet to slide in the stirrups when you trot for the first time but this is because they’re not in the stirrups properly. If the balls of your feet are resting on the stirrups with your toes pointing up and your heels downwards then your feet will stay in place, helping your overall balance.
Relax
Okay, so I admit this isn’t part of your posture but it’s crucial that you relax and don’t concentrate too much on what you’re doing. I know that might sound strange to say but one of the biggest mistakes new riders make is they try too hard to do everything right rather than ‘feel’ what’s right. It’s a bit like watching your hand as you’re writing, the more you think about what you’re doing the harder it is to do it.
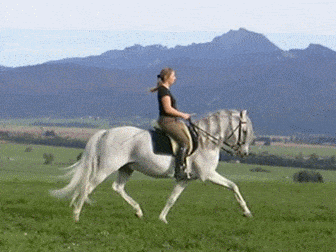
How do you move with the horse at a trot?
While the trot is only one gear up from a walk it will feel very different as you try to not bounce around too much. Some instructors say you should look down to see if you’re moving in time with the horse’s legs but I think this is a bad idea as it encourages you to be unbalanced. Instead, I suggest riders feel the horse, if it feels bouncy you’re probably not moving in time with the horse. That said how you should be moving will be dependent on the type of trot you’re doing, jog (or sitting), post (or rising), or standing.
Jog trot
Sometimes called a sitting trot, the jog is the slowest of all trots. The horse’s stride is short which can give the impression of the horse shuffling along. There’s no upward push in the jog but that said some horses can be a little bouncy which is why you need to have supple hips.
Regardless of whether you’re riding Western or English the jog is ridden in the same way, with your hips rotated forward so that you’re sitting on the insides of your thighs. Your heels and legs should be down with your shoulders over your hips, sitting like this will prevent you from inadvertently tipping forward. Your back should also be relaxed so that you can follow the horse’s movement.
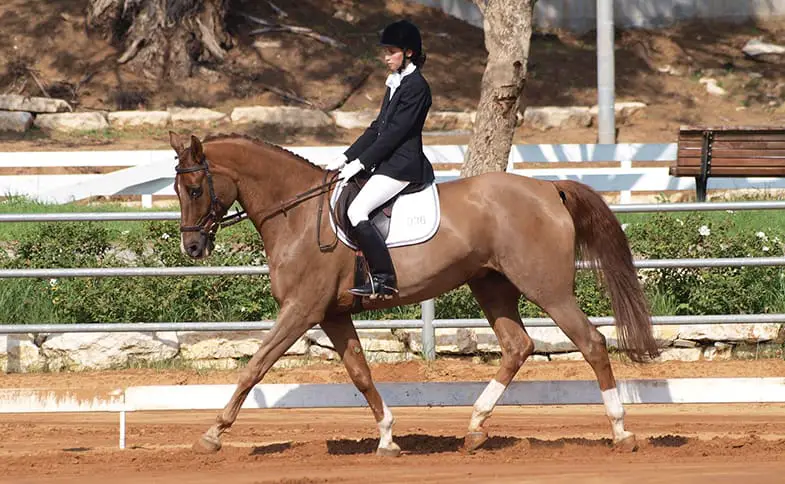
Posting trot
Being faster than a jog, a posting trot has a very definitive upward push which causes the rider to rise out of the saddle, one of the reasons why it’s referred to as a rising trot in some countries.
New riders often think that they need to rise fully out of the saddle but this will tire you very quickly. Instead, you should move in a forward and back motion with your hips moving forward out of the saddle and gently back again on alternate beats.
When posting the trot it’s important to be relaxed and allow the horse’s movement to push you out of the saddle, don’t grip with your knees or use the stirrups to help you rise. Instead, you should move forward with your hips, making sure your knees, lower legs, and feet are still. It’s also important to make sure you move forward rather than rise up, the reason for this is that if you move forward you’re moving in time with the horse, whereas if you move up the horse will move forward and you’ll end up coming down on their back.
Please note: Whatever you do though don’t use the reins to pull you out of the saddle as this will hurt the horse’s mouth.
Want to know more about when to post and when to sit? Trotting diagonals: everything you need to know.
Standing trot
Some horses are so bouncy that sitting the trot is practically impossible which means you’ll have to stand instead, although this can become tiring very quickly.
If you do need to stand instead of sit then you should bend forward at the hip rather than actually stand in the stirrups. Your knees should be bent at around a 45° angle with your back being straight and your shoulders back, and relaxed. You don’t need to stand bolt upright but instead make sure your seat is just out of the saddle, if you feel unsteady you can place your hand on the horse’s neck or the horn of the saddle to help you maintain your position.
Standing while trotting will also help you to develop your balance and strengthen your legs, something that will be of great benefit when you’re posting the trot.
How do you improve your position when riding a horse at a trot?
Learning anything new takes time, in part because you need to learn to use a whole new set of muscle groups and horse riding is no different. The more you ride the better you’ll become but there are a few things that you can do to improve your position when jogging and posting.
Jog trot
It might sound silly but using a playground swing can help you to sit properly when trotting. Sit on the swing with your feet lifted off of the ground and use only your body to move the swing (without ‘pumping’ your legs). Steadily rocking your hips to help you move is the same movement you’ll make when sitting a trot.
Another exercise you can do to help improve your posture when trotting is to sit in a chair with your feet apart on the ground (they should be level with your hips). Put your arms across your chest with your hands on your shoulders and then use your hips to lift yourself out of the chair. This will help strengthen your muscles and make it easier for you to sit the trot.
Posting trot
With the horse stationary (at a halt) stand up in the stirrups so that your hips are forward and over your knees and your bottom is completely out of the saddle. Keeping your legs below you and your heels down, hold that for ten seconds (using the horn of the saddle to support yourself if you’re unable to keep your balance) before lowering yourself back into the saddle. NEVER use the reins to support you.
Once you’ve mastered that and can stand like that without holding on it’s time to repeat the same exercise with the horse walking. This will help you to improve your balance and help you to understand what the horse is doing.
General trotting
A lot of horse riders do pilates or yoga to improve their core strength but if you don’t fancy doing either of those there are simple exercises you can do at home to strengthen your core. You can read more about those in this article: core exercises equestrians swear by.
Want a quick recap? Learn how to ride a horse at a walk.
What next? Now that you’ve learned to trot it’s time to learn how to ride a horse at a canter.
I hope you found this article helpful. If you did I’d be grateful if you could share it please as it would really help me.
Recommended products
Over the years I have tried hundreds of different horsey products, from various blankets and halters to different treats. Some I’ve loved, others I’ve hated but I thought I’d share with you my top all-time favorite products, the ones I never leave the yard without. I’ve included links to the products (which are in no particular order) that I really think are great.
- Horse Knots by Reference Ready – If you’re like me and enjoy pocket reference guides then you’ll love this knot tying guide. These handy cards can easily fit in your pocket or attach to the saddle for quick reference. They’re waterproof, durable and are color coded to make them easy to follow.
- Mane ’n Tail Detangler – Even if you never show your horse you’ll need to detangle his tail from time to time (and possibly his mane too) which is always a challenging chore! I’ve found that if I run a little bit of detangler through my horse’s tails every few days it stops them from getting matted up and makes combing them easy, even if they’re coated in mud. I don’t know if I should admit to this or not but it also works wonders on my hair.
- TAKEKIT Pro clippers – Over the years I’ve tried a lot of different clippers and while some were obviously better than others I found these to be by far the best. They are heavier than a lot of other clippers but for me, that’s a good thing, it makes them feel more sturdy and hardwearing. On top of that they have a range of speeds so are just as good for clipping your horse’s back as they are his face. I also like the fact that they come in a handy carry case but that’s not for everybody. The company that makes them is super good and incredibly helpful too, a real bonus these days. The only thing I wasn’t keen on was the fact that it doesn’t come with any oil, but that’s not a major problem as it’s not difficult to buy lubricant.
- Shire’s ball feeder – There are so many boredom buster toys out there but I like to use these every day, regardless of whether or not my horses are bored. I find that it helps to encourage my horses to problem solve by rewarding them with treats (or pieces of fruit) but it also mimics their natural grazing behavior which helps to keep them calm and de-stressed.
- Horse safe mirror – This is a strange one that many people are surprised about but I like to put horse safe mirrors in the trailers as well as in the quarantine stalls. It helps to prevent the feeling of isolation by giving the impression of other horses being around. Being herd animals horses can get extremely stressed when they feel that they’re on their own but with these stick-on mirrors, they believe that at least one other horse is with them.
- Rectal thermometer – I know this isn’t glamourous at all but it’s vital for your horse’s well-being to be able to check their temperature and a rectal thermometer is the easiest way of doing this which is why I’ve added it to the list.
Shopping lists
I’ve also put together a few shopping lists of essential items that I’ve found helpful over the years. I’ve broken the lists down into different categories rather than put everything in one massive list 😉
Recent Posts
Pads & Blankets: What Are They And Are They Really Necessary?
When we think about what tack we need, saddle pads and saddle blankets aren’t often at the forefront of our minds. We all know that they go underneath a saddle but there’s still a lot of...
Have you ever wondered what racehorses wear over their eyes, or seen a horse pulling a carriage with its eyes covered? Known as blinders or blinkers, these strange coverings do actually serve a...
