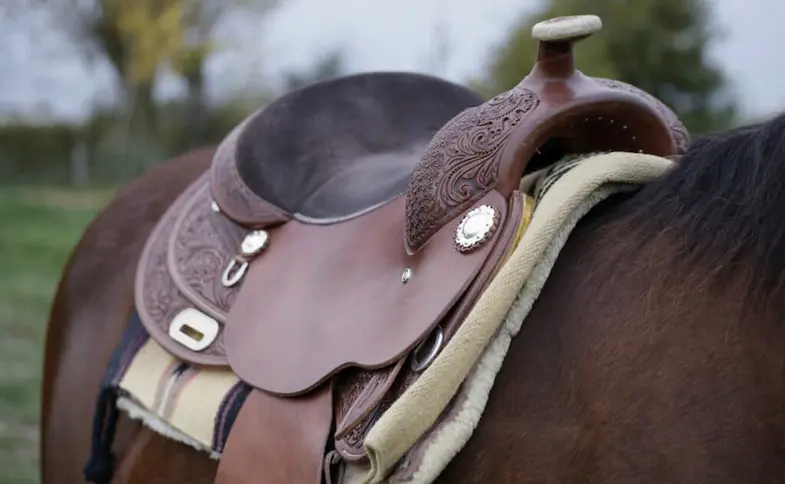
On a recent trip to my local tack shop, I noticed that they had a second-hand Western pleasure saddle for sale, and while it was a bargain (at just $250) it was in a terrible condition which started me wondering if it had ever been cleaned! While most of us don’t enjoy cleaning our tack (and therefore don’t do it as often as we should) it’s something that is so important and doesn’t take anywhere near as long as people think to do. With this in mind, I decided to write a complete guide to not only cleaning your saddle properly but how to do it in a way that will save you time and make it last longer.
While most of us don’t have the time to thoroughly clean the saddle after every ride simply wiping the dirt off will not only help to protect it but will also make it much easier to clean when we do have time to wash and condition the whole saddle (which you should do at least once a month).
I know it’s a task that many of us hate and often put off, stating that we’ll do it next time but when you consider the benefit it can have to your horse (in terms of comfort) it’s something that we really shouldn’t put off. On top of that, regular and proper cleaning of your saddle will ensure it lasts for many decades, and when you take into account that a good trail saddle can cost many hundreds (if not thousands) of dollars this is a great thing.
Preparing a leather saddle for cleaning
While you might think that preparing our saddle beforehand will just waste time and is unnecessary it will, in fact, save you time in the long run, especially when it comes to putting the saddle back together after.
Remove fittings from the saddle
You don’t need to take the saddle to pieces completely, but remove the parts that are easy to take off, things such as the stirrups and stirrup leathers, cinches or girth, billets, etc. You should put these parts to the side ready to be cleaned when you move onto actually cleaning the saddle. If you use English stirrups you should put them into a bucket of warm soapy water (and wash them with a stiff-bristled brush later), otherwise, put your Western stirrups with the rest of the fittings.
If you want to give your saddle an extensive clean you can remove all of the other parts us simply unscrewing them but make sure you don’t lose the screws (sadly I’ve lost way too many in the past).
Undo all of the buckles
Once you’ve removed all of the fittings you should leave the buckles undone (and undo the rest if there’s any left). While it’s not essential that you do this now, doing so at this stage will save you time when you’re actually cleaning the saddle.
Protect non-leather parts of the saddle
While you don’t need to protect non-leather parts doing so will mean that you can clean the saddle without worrying about getting any soap, foam, or conditioner on them. There are a few different methods for protecting them but I prefer to use a piece of plastic (such as an old bag) and then tape it to the suede with low tack tape.
I also like to put low tack tape over the metal findings as well as any decorative metal plates of the saddle too.
Make sure you have clean water
You should always have at least one bucket of warm water to hand when you’re cleaning your saddle but I like to use the ‘two bucket method’. While it might sound like a hassle this method means that you’re never reapplying the dirt to your saddle. One bucket should be used for dampening the sponge before using it on the saddle while the other should only be used for rinsing the sponge after using it. I also like to use one sponge to apply the soap or foam and another (or a cloth) to remove any excess, again this prevents the chance of adding dirt to the saddle.
Have your sponges and cleaning products ready
I know this is obvious but I thought I’d mention it anyway, if nothing else because I’ve lost count of how many times I’ve sat down to clean my saddle only to find that I’ve left the sponges in the tack room or the conditioner is still in the cupboard.
How to clean a leather saddle
Now that you’ve prepared your saddle it’s time to start cleaning it. It doesn’t matter if you clean the saddle or the fittings first but I find it quicker to clean the saddle then, after you’ve removed the excess soap or foam, clean the findings. This way if you haven’t dried the saddle completely it’ll have the chance to do so naturally before you apply the conditioner.
Remove any excess dirt from the saddle
Before you can start to really clean and protect your saddle you’ll need to remove all of the dirt from it. In most cases, a damp microfibre cloth or leather cleaning wipes will get the dirt off but if there’s a lot of it then it’s advisable to remove it beforehand with a medium bristled. This will prevent the dirt from being spread across the saddle but will also help to loosen the dirt before you wipe it off.
If you clean the dust and dirt off of your saddle after every ride you’ll probably be able to skip this step, either that or it’ll only take you a few minutes.
Use soap or foam to clean the saddle
Once you’ve removed the excess dirt from the saddle it’s time to clean the leather which will help to remove all of the ground in dirt as well as any dirt that’s found its way into the stitching. In the past the only option for cleaning leather was saddle soap but, while that still remains a firm favorite, many people are choosing to use a foam cleaner instead. There’s a certain amount of personal preference involved in which one you use but if you have a light colored saddle I’d recommend a foam instead, this is because some saddle soaps will darken lighter leather a little bit.
Foam
Most foam cleaners should be mixed with warm water to create plenty of suds, once you have this you should then use a soft-bristled brush or sponge to clean the saddle but make sure you’re not applying too much water to the saddle. Make sure the brush or sponge is only damp (and being mainly suds rather than water) and work it in a circular motion over the whole saddle.
Saddle soap
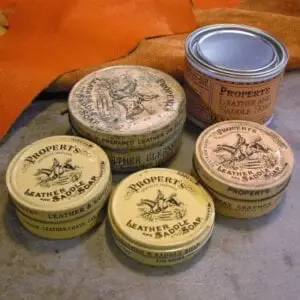
If you’re using saddle soap then this should be applied to the saddle (again in a circular motion) with a damp sponge and worked into a lather. If the sponge gets dirty then you should rinse it before reapplying more saddle soap (this is where the two bucket method comes in handy).
When cleaning the saddle don’t forget to clean underneath all of the flaps as well as under the saddle itself.
Remove any excess soap
Once you’ve cleaned the whole saddle you need to remove the excess foam or soap residue in order to stop it from damaging the leather. This can easily be done by using a damp microfibre cloth or a sponge to wipe from the top of the saddle downwards in single swipes. Don’t forget to remove the residue from all of the folds and crevices as well as around the stitching. If you can’t get the cloth into those areas don’t worry, a Q-tip won’t have any trouble – just make sure you don’t leave any of the cotton behind instead.
Repeat for fittings
As I said earlier, this is the time to clean the leather parts you removed before which should be cleaned in exactly the same way as the saddle. The best way of doing this is to clean every part first, then remove the residue once you’ve cleaned them all.
Condition the leather
After you’ve cleaned the leather and it’s dry it’s time to condition it, this will help to keep the leather supple, prevent cracking and help to extend its life. When you’re conditioning the leather the most important thing is to add moisture to it, this is why it doesn’t really matter if you use a specialist leather conditioner, Vaseline, beeswax, or even coconut oil.
When conditioning your saddle, use a soft cloth (ideally a microfibre) to apply it sparingly all over the saddle and the fittings. Don’t use too much conditioner otherwise it’ll seep through the leather into the padding or tree and, over time, damage them, you should also be careful when applying it around any non-leather parts such as the seat. After you’ve conditioned the whole saddle leave it for approximately 15 minutes to dry naturally.
Clean non-leather parts of the saddle

These days a lot of saddles have suede or nubuck seats that shouldn’t be washed or conditioned, the trouble is they still get dirty! Don’t worry though this can easily be cleaned by either vacuuming the dirt and dust off or using a stiff-bristled brush to remove it. You can also use a mildly damp cloth to spot clean really dirty areas. Once you’ve removed the dirt from the suede or nubuck, use a clean brush to bring the nap back.
If your saddle has any decorative parts that are made of metal you can use a little bit of metal polish to get these to really shine. Make sure they’re clean and completely dry then just apply a very little bit of polish with a soft cloth. You can also use polish on buckles and other findings too if you want.
The final step
Now that you’ve cleaned and conditioned your saddle it’s time to put all of the fittings back before putting the saddle away, ready for when you next need it.
Why is it important to clean a leather saddle?
As you use your saddle sweat and dirt will start to build up which, over time, will start to break down the leather and stitching. The leather will begin to lose its soft nature and will become more brittle which can result in stiff edges rubbing against your horse causing sores. The more brittle leather is the more it’s likely to break too, the same is also true for the stitching, as sweat starts to seep in it weakens it which can cause it to break and come undone.
This is why it’s so important to keep your saddle clean and well-conditioned. On top of this though, a saddle that’s not looked after will only last for around 5 years whereas a well-conditioned saddle that’s regularly cleaned can last for many decades.
How often should you clean a leather saddle?
Cleaning your saddle properly will protect it and prolong its useful life but that doesn’t mean you need to spend hours cleaning it after every ride. A quick wipe (either with leather wipes or a damp towel) to remove any dust after every ride will suffice in most cases unless of course, it’s really muddy. If, however, your saddle is really dirty you should wait for the mud or sweat (or whatever is making it dirty) to dry before wiping off what you can, then wash it.
Depending on how often you ride you should give your saddle a thorough clean at least once a month (if you ride every day then you should clean it every other week instead), and when I say thorough I REALLY mean it. You should remove all of the fittings and fully wash and clean it as well as conditioning too.
Saddle cleaning kit essentials
While everybody will have their own cleaning kit essentials I thought I’d list the ones I keep in mine, along with links to Amazon (where possible) if you want to add them to your kit.
- Buckets
- Sponges
- Microfibre cloths
- Wipes
- Saddle soap
- Saddle form
- Q-tips
- Conditioner
- Soft-bristled brush
- Stiff bristled brush
- Handheld vacuum
- Metal polish
There are two things to consider when using the same bit for multiple horses, the fit of the bit and any health issues the horse has. When it comes to the fit, it’s crucial that it’s right for both horses and doesn’t pinch at all. That said though if one of the horses has a contagious health issue they will pass it on to other horses using the same mouthpiece. With this in mind, you can use the same bit but it’s not advisable.
Can you make your own saddle soap?
If you prefer to make your own saddle soap you can easily do that by mixing unperfumed soap with beeswax in boiling water (you should use approximately twice as much water as soap and beeswax). Once the soap and beeswax has completely melted remove the pan from the heat and mix in neatsfoot oil (about a third of the amount of beeswax or soap), stirring until it’s all mixed together. Next, leave it to cool for a few minutes before pouring it into a sealable container. You can then use it whenever you need to.
How do you clean a synthetic saddle?
Most synthetic saddles can easily be cleaned by wiping them down with a little bit of warm water and a damp sponge. Doing this after every ride will ensure that your saddle remains in the best condition. If, like some leather saddles, it has a suede seat then you should use a vacuum or stiff-bristled brush to clean that.
I hope you found this article helpful. If you did I’d be grateful if you could share it please as it would really help me.
Recommended products
Over the years I have tried hundreds of different horsey products, from various blankets and halters to different treats. Some I’ve loved, others I’ve hated but I thought I’d share with you my top all-time favorite products, the ones I never leave the yard without. I’ve included links to the products (which are in no particular order) that I really think are great.
- Horse Knots by Reference Ready – If you’re like me and enjoy pocket reference guides then you’ll love this knot tying guide. These handy cards can easily fit in your pocket or attach to the saddle for quick reference. They’re waterproof, durable and are color coded to make them easy to follow.
- Mane ’n Tail Detangler – Even if you never show your horse you’ll need to detangle his tail from time to time (and possibly his mane too) which is always a challenging chore! I’ve found that if I run a little bit of detangler through my horse’s tails every few days it stops them from getting matted up and makes combing them easy, even if they’re coated in mud. I don’t know if I should admit to this or not but it also works wonders on my hair.
- TAKEKIT Pro clippers – Over the years I’ve tried a lot of different clippers and while some were obviously better than others I found these to be by far the best. They are heavier than a lot of other clippers but for me, that’s a good thing, it makes them feel more sturdy and hardwearing. On top of that they have a range of speeds so are just as good for clipping your horse’s back as they are his face. I also like the fact that they come in a handy carry case but that’s not for everybody. The company that makes them is super good and incredibly helpful too, a real bonus these days. The only thing I wasn’t keen on was the fact that it doesn’t come with any oil, but that’s not a major problem as it’s not difficult to buy lubricant.
- Shire’s ball feeder – There are so many boredom buster toys out there but I like to use these every day, regardless of whether or not my horses are bored. I find that it helps to encourage my horses to problem solve by rewarding them with treats (or pieces of fruit) but it also mimics their natural grazing behavior which helps to keep them calm and de-stressed.
- Horse safe mirror – This is a strange one that many people are surprised about but I like to put horse safe mirrors in the trailers as well as in the quarantine stalls. It helps to prevent the feeling of isolation by giving the impression of other horses being around. Being herd animals horses can get extremely stressed when they feel that they’re on their own but with these stick-on mirrors, they believe that at least one other horse is with them.
- Rectal thermometer – I know this isn’t glamourous at all but it’s vital for your horse’s well-being to be able to check their temperature and a rectal thermometer is the easiest way of doing this which is why I’ve added it to the list.
Shopping lists
I’ve also put together a few shopping lists of essential items that I’ve found helpful over the years. I’ve broken the lists down into different categories rather than put everything in one massive list 😉
Recent Posts
Pads & Blankets: What Are They And Are They Really Necessary?
When we think about what tack we need, saddle pads and saddle blankets aren’t often at the forefront of our minds. We all know that they go underneath a saddle but there’s still a lot of...
Have you ever wondered what racehorses wear over their eyes, or seen a horse pulling a carriage with its eyes covered? Known as blinders or blinkers, these strange coverings do actually serve a...
