Not everybody will bandage or wrap their horse’s legs prior to exercising them but if you choose to do so then it can be difficult to know how to wrap them properly, especially if you’ve never bandaged a horse’s legs before. For a bandage to work properly you need to wrap the horse’s legs so that they are able to not only still move freely but also so that they don’t fall off either.
Why should I bandage my horse’s legs for exercise?
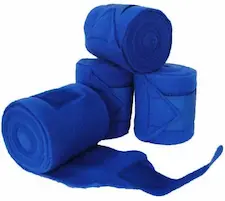
Regardless of the type of work your horse is doing bandaging or wrapping his legs will help to protect them from scrapes and injuries that can occur while jumping as well as from bruising which can be caused by the legs brushing against each other. The bandages will also offer support to your horse’s tendons and ligaments, especially if he has suffered a leg injury or has weak tendons. While you should never use exercise bandages if you’re not exercising your horse they can also help to support his legs during impacts felt from jumping or just galloping.
How do I bandage my horse’s legs for exercise?
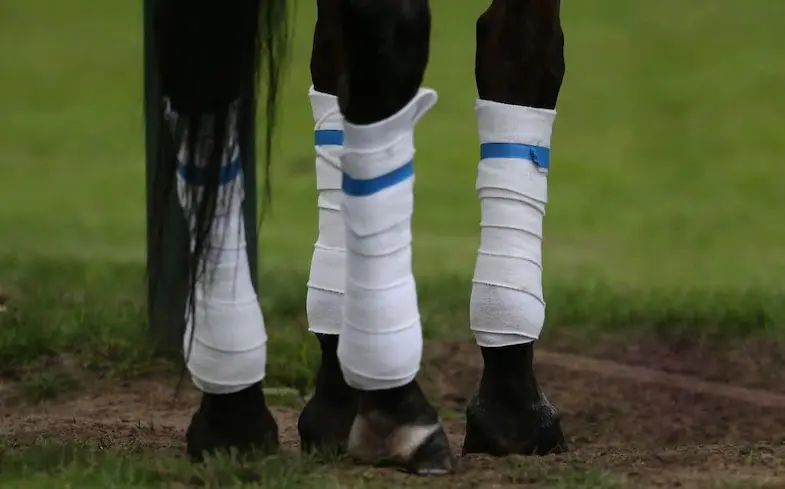
When fitted properly the bandages should cover the legs from just above the fetlock to just below the knee or hock and have padding underneath them. The tension of the bandages should be even but they shouldn’t be so tight that your horse isn’t able to flex his joints and should be removed straight after you’ve finished.
How to correctly fit the bandages
- Start by wrapping the padding (such as Gamgee, Fybagee or Porter boots) evenly around the leg. Always work from the front to the back and make sure you finish on the outside of the leg.
- If you’re using stretchable bandages then unroll a little each time, let it go slack then start to wrap that before unraveling a little bit more, letting that go slack and then wrapping that. Repeating this process will allow you to not fasten the bandage up too tight.
- Leaving approximately a 3 inch area of padding at the top, start to roll the bandage around the leg with the bandage facing front to back.
- Always roll the bandage away from you over the tendon and towards you over the bone – I.E. counterclockwise on the nearside and clockwise on the offside.
- Once you’ve completed the first turn on the bandage fold the top tab over and wrap the bandage over it. This will keep it secure without the need for any pins or tape.
- Continue wrapping the rest of the leg, making sure you cover around two thirds of the previous turn every time.
- As you go make sure you keep an even pressure and that there are no creases in the padding (or bandage).
- When you get to around half an inch below the ergot start wrapping back up the leg leaving an upside down V at the front where the bandage crosses and starts to return up the leg.
- Some bandages will come with a tape or Velcro to fastening them but if yours only have ties then make sure you keep them flat and fasten them with a reef knot on the outside of the leg. They avoid any unnecessary pressure only fasten them on the outside and never on the bone at the front of the tendon at the back of the leg.
- Fold the top of the last turn over the knot so that it’s covered. If you want to you can also secure the bandage with tape but make sure you don’t do it up too tightly. As long as you’re extremely careful you can also see the fastening for extra security.
It’s crucially important that when you apply the bandages they’re tight enough so that they won’t come undone and cause a hazard to your horse or get caught around his legs while at the same time not being so tight that they cause damage to his tendons.
What’s the difference between Gamgee, Fybagee or Porter boots.
When it comes to the type of padding you use under the bandages there are a number of different options. Which ones you use are largely up to you and your personal preference. Some people swear by Gamgee’s while others will only use Porter boots. While not as popular in the US, Fybagee’s are very popular in the UK and throughout Europe.
Gamgee – These are a highly absorbent form of padding that is used under bandages to give the horse protection and padding. They’re very versatile and are regularly used as a wound dressing, for support and to give insulation. Their versatility makes them a must-have for any equine first aid kit too. While not being machine washable they are reusable.
Fybagee – More common in Europe than they are in the US, Fybagee’s come pre-cut and can be purchased with or without knee or hock protection. Like the Gamgee, they can be used under exercise bandages. One drawback to them though is that they’re not machine washable, you don’t need to through them away after every use but when they’re looking grubby you won’t be able to wash them.
Porter boots – Mainly used in eventing they are now becoming popular for competitive cross country driving and endurance too. They’re designed for high-intensity disciplines and are double layered with a hard outer layer and supportive inner layer. They don’t hold water so allow your horse’s legs to stay cool without losing any of the support and protection the tendons need.
What’s the difference between exercise bandages and polo wraps?
Both used to protect your horse’s legs during exercise you may be surprised to know that there is actually a difference between exercises bandages and polo wraps. One of the main differences is that polo wrap are generally used without padding so don’t offer the same level of protection that exercise bandages do. That said if you’re doing light work where the chance of your horse scrapping his legs is minimal or longeing (or lungeing) then you might want to use them instead. Unlike exercise bandages though you can turn your horse out in polo wraps if the pasture isn’t wet.
I don’t want to bandage my horse’s legs but still want to protect them, what can I use?
If for whatever reason don’t want to bandage your horse’s legs then don’t worry you can use brushing boots (sometimes called splint boots) instead. These work in the same way as bandages do but instead of needing to be wrapped can just be put around your horse’s legs and then fastened. The advantage of is that they’re much quicker to use than bandages, the disadvantage though is that unlike the ‘one size fits all’ appeal of bandages you need to have the right size for your horse.
As a rough guide to finding the right size brushing boots for your horse the table below will hopefully help:
| Horse size | Forelegs | Hindlegs |
| Up to 13.1hh | Small | Small |
| 13.2hh – 14.1hh | Small | Medium |
| 14.2hh – 15.1hh | Medium | Medium |
| 15.2 – 16.2hh | Medium | Large |
| 16.3hh or greater | Large | Extra Large |
My horse overreaches, what’s the best thing to use for that?

Some horses will overreach due to lack of balance which can be corrected over time, but if your horse’s overreaching is because of his conformation then that can’t be corrected so you need to use overreach boots. Sometimes referred to as bell boots, they are unsurprisingly bell-shaped and fit over your horse’s forelegs. They can either be slipped over the hooves or fastened with Velcro and will protect the back of the pastern and heels.
What other types of bandages are there?
People wrap their horse’s legs for a number of reasons, not just to give support and protection to the tendons. As you would expect you should wrap any wounds to protect them from contamination and but also to help the healing process, although you should seek medical advice first if the wound is bad. Bandages can also be used to reduce swelling after exercise or injury or to protect your horse’s legs while he’s on box rest or in transit.
What about bandaging the tail?

If you’re going to be transporting your horse or have clipped his tail you might want to protect it with a bandage. The process for bandaging the tail is the same as that of legs except you don’t need to return right the way back to the top and don’t need any padding underneath it. You only need to double back on the wrap a little way. Before applying the bandage you can dampen your horse’s tail a little but should never wet the bandage as this will cause it to tighten when it dries. Leaving a few inches exposed start rolling the bandage under the horse’s tail from right to left. After you’ve wrapped it around once fold the first bit over and cover it with the next turn. Then repeat until you’ve wrapped as much as needed then return about an inch or two back up the tail before fastening the bandage.
How do I remove my horse’s bandages?
To remove the bandages start by undoing the ties (or Velcro if your bandages have that) and then unwind the bandage. As you do this it’s important to pass it from hand to hand around your horse’s leg. This will prevent it from sagging on the floor and possibly getting caught around your horse’s legs as he moves, but will also help you to re-roll it back ready for storage. Unless you’ve bandaged a wound you should be able to just remove the padding after you’ve taken the bandage off. If, however you are using it on a wound you might have to cut the padding off. If you do need to do this use round-ended scissors (sometimes called bandage scissors) to carefully cut a line from top to bottom and then very gently remove the padding and dispose of it.
When it comes to removing the tail bandage simply undo the ties and then starting at the top slide it down and remove it in one go. Once you’re taken the bandage off you can then re-roll it ready to store it for next time.
Conclusion
As a rule, all bandages are applied in the same way, in those much as you start at the top then double back when you get to the bottom. It’s also vitally important that they’re secured properly as they will come undone if too loose or could cause damage to your horse’s tendons if too tight. It’s easy to tell though if the tightness is right – too loose and you’ll be able to move them but if you can’t fit the top of your finger under the bandage then you’ve done it up too tight.
I hope you found this article helpful. If you did I’d be grateful if you could share it please as it would really help me.
Recommended products
Over the years I have tried hundreds of different horsey products, from various blankets and halters to different treats. Some I’ve loved, others I’ve hated but I thought I’d share with you my top all-time favorite products, the ones I never leave the yard without. I’ve included links to the products (which are in no particular order) that I really think are great.
- Horse Knots by Reference Ready – If you’re like me and enjoy pocket reference guides then you’ll love this knot tying guide. These handy cards can easily fit in your pocket or attach to the saddle for quick reference. They’re waterproof, durable and are color coded to make them easy to follow.
- Mane ’n Tail Detangler – Even if you never show your horse you’ll need to detangle his tail from time to time (and possibly his mane too) which is always a challenging chore! I’ve found that if I run a little bit of detangler through my horse’s tails every few days it stops them from getting matted up and makes combing them easy, even if they’re coated in mud. I don’t know if I should admit to this or not but it also works wonders on my hair.
- TAKEKIT Pro clippers – Over the years I’ve tried a lot of different clippers and while some were obviously better than others I found these to be by far the best. They are heavier than a lot of other clippers but for me, that’s a good thing, it makes them feel more sturdy and hardwearing. On top of that they have a range of speeds so are just as good for clipping your horse’s back as they are his face. I also like the fact that they come in a handy carry case but that’s not for everybody. The company that makes them is super good and incredibly helpful too, a real bonus these days. The only thing I wasn’t keen on was the fact that it doesn’t come with any oil, but that’s not a major problem as it’s not difficult to buy lubricant.
- Shire’s ball feeder – There are so many boredom buster toys out there but I like to use these every day, regardless of whether or not my horses are bored. I find that it helps to encourage my horses to problem solve by rewarding them with treats (or pieces of fruit) but it also mimics their natural grazing behavior which helps to keep them calm and de-stressed.
- Horse safe mirror – This is a strange one that many people are surprised about but I like to put horse safe mirrors in the trailers as well as in the quarantine stalls. It helps to prevent the feeling of isolation by giving the impression of other horses being around. Being herd animals horses can get extremely stressed when they feel that they’re on their own but with these stick-on mirrors, they believe that at least one other horse is with them.
- Rectal thermometer – I know this isn’t glamourous at all but it’s vital for your horse’s well-being to be able to check their temperature and a rectal thermometer is the easiest way of doing this which is why I’ve added it to the list.
Shopping lists
I’ve also put together a few shopping lists of essential items that I’ve found helpful over the years. I’ve broken the lists down into different categories rather than put everything in one massive list 😉
Recent Posts
Pads & Blankets: What Are They And Are They Really Necessary?
When we think about what tack we need, saddle pads and saddle blankets aren’t often at the forefront of our minds. We all know that they go underneath a saddle but there’s still a lot of...
Have you ever wondered what racehorses wear over their eyes, or seen a horse pulling a carriage with its eyes covered? Known as blinders or blinkers, these strange coverings do actually serve a...